

I have received quite a few e-mails about familysearch.org, thanks in large part to the number of columns I have written that tell you all to use it. Although the site is relatively simple, there is a lot going on in it, and the most frequent question I am asked is “How do I get started?”

Step one is to set up an account. If you’re LDS, set up your account by clicking “Are You LDS?” “Yes” and using your LDS membership number from your ward clerk. If you’re not LDS, just create an account on the site by selecting “Are You LDS?” “No”. This identifies you when working with trees, messages etc. You can use familysearch without a user name but you might run into records that require you to have an account. None of this data will be used or sold except to contact you when you have problems using the site. You will need to give them an e-mail or phone number to send you a password reset if you forget your password. The site is completely FREE and you will never be asked for a credit card or other payment info.
OVERVIEW
Family Tree — Rather than use Family Tree Maker, Roots Magic etc., you can put your family tree on familysearch.org and update it there. If you already have your data in a software program, you can export to gedcom and upload it to familysearch. You can add sources and photos to the data. You can have familysearch check everyone else’s trees to see if there are matches, to help you connect to other people and other research. If you find a close match with someone else, you can connect with them to have a “discussion” of the data you disagree on. You decide which ancestors are living or deceased, and familysearch will let only you see that data. Other people who search for your living parents will not see this private information.
Memories — You can upload photos of your ancestors, set up a portrait photo for each ancestor to use when you print or view the family tree, and add other photos and documents (PDF). You can write a story about the photo or document. People can then search each other’s “memories”.
Search — The microfilms you order through Family History Centers are in the process of being loaded onto the familysearch website for browsing at home. They are also being indexed by volunteers so you can search for a record without browsing through entire films. Many other records are being added to “search” that have never been available on microfilm, such as an index to Cook County Births, Marriages and Deaths.
Indexing — You can help this massive project by volunteering to index records. First, you download the indexing software. You may have to set up an account just to index. You select a project, such as “1865 Illinois Census”, “Bari Italy Civil Registration” etc. You are then assigned a batch of records that can be indexed in less than an hour. You can set preferences to determine the degree of difficulty of the records you want to index, based on your previous experience with different languages and types of records. As you begin a batch, you will be given instructions and guidelines. The software will show you a record and guide you visually as you type in the data you see on the image. After you complete the batch, you get a chance to review your work and submit it. Other people will also index the same batch and the results will be compared and reviewed if necessary by an arbitrator.
Messages — When other people want to contact you regarding an ancestor, or some data about the ancestor, they can send you a message through familysearch. Similar to ancestry.com.
Volunteer — This is another way to get to the indexing page. You can also apply to be an arbitrator.
Get Help — Incredible resource for not only working with familysearch.org web site but also with records and genealogy in general. Help Center is about the web site. Learning Center contains hundreds of online courses on the records of different countries. The Research Wiki has articles on finding and reading records from all over the world. What’s New shows changes to the familysearch web site, which happen at breakneck speed!
FAMILY TREE
You can post and work with your family tree here, and search other people’s trees for possible matching relatives. You can either start from scratch, and familysearch will create a new tree with you as the home person. Or you can upload a gedcom file from your existing family tree software and work with it. I do not recommend using BOTH software and familysearch to edit your tree, because you will not remember which one you updated with new information, and you will have to update two different systems. See SEARCHING: GENEALOGIES for how to upload your gedcom.

Click on on the following to see the details of the person.

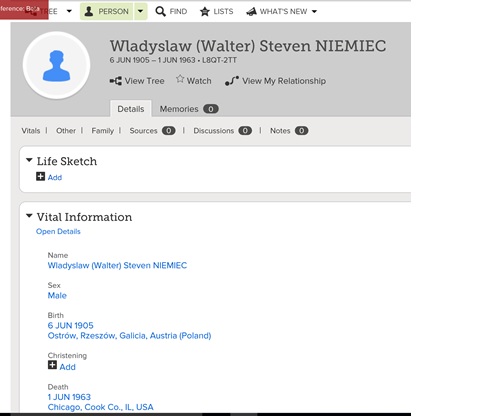
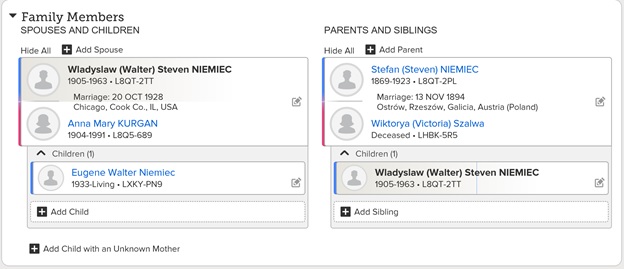
As usual, anything in blue is a link that can be clicked. You can add parents, children, or siblings of whomever you are working on by clicking the following.

Click on the data itself to change it. It is best to select a “standardized” date and place for each field.
MEMORIES
This feature works best with Family Tree. If you don’t have a tree, you cannot link your photos to a specific person. However, you can put the person’s name in the description.
To add photos, you click the large green plus and you can either drag and drop the photos, or you can choose the photos with Windows.

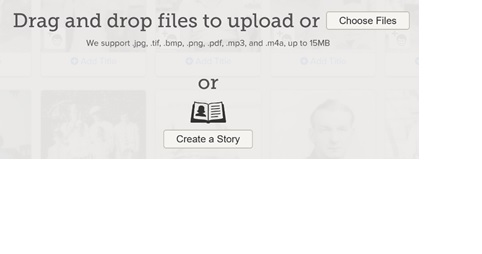
If you create a story, you get to type a paragraph to go along with the photo. After you upload the photos, you can move specific ones into an album of your creation. You’ll be asked to agree to a submission agreement that basically says not to upload copyrighted or explicit photos.
If a photo has twenty people in it, and you tag as many as you can, those photos will be listed under each of the tagged people. Back in Family Tree, after you upload photos and link them to people, you can edit the portrait photo of the person.
SEARCH: HISTORICAL RECORDS
Not every film has been loaded into familysearch.org. In fact, some can never be on the site due to contractual agreements, such as Cook County Vital Records. Not every film that appears on line has been indexed. Not every indexed film was indexed correctly. Ok, now that we have the bad news out of the way….
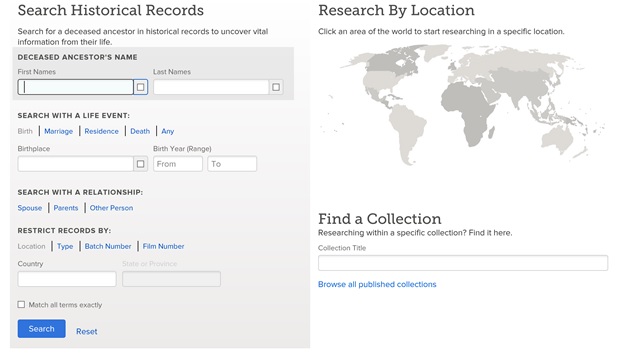
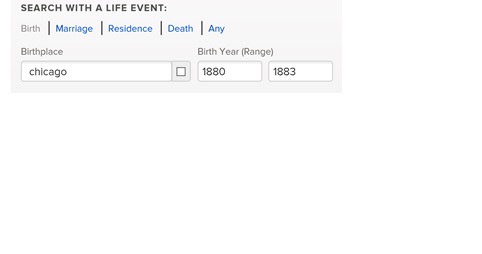
If you want to search indexed records, you can type the first and/or last name, but you can choose to omit BOTH. You can limit the location(s) of the birth, marriage, death, or residence by clicking on that word and entering a location and a range of years. So let’s not find every John Smith, just the ones born in Chicago between 1880 and 1883.
You can select more than one of these “Life Events” and all of them will apply to your search. So let’s also limit John Smiths who died in New York between 1940 and 1950.
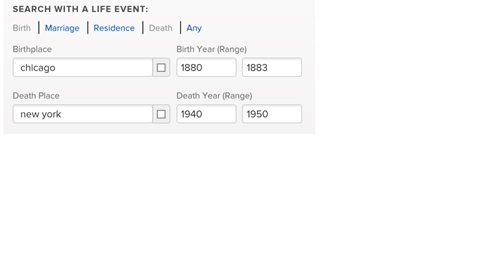
Be advised that if the record type (let’s say Marriage) doesn’t know that he died in New York, it might not find the record you want. Also, if you want to limit the first name, last name, location etc. to exact matches only, check the box next to that field.
Familysearch will give you close matches for every field, and the entire result list will be sorted by the closest matches of all the fields first, then slightly further matches, then “way off”. But you should try it without checking the “exact” box. “Match All Terms Exactly” will check the boxes for every field you entered data in.
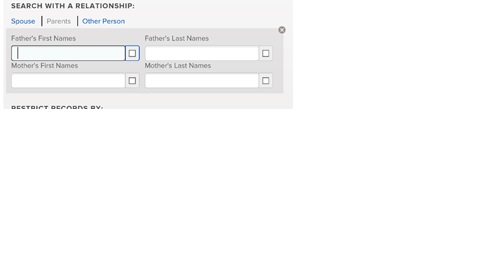
You can also limit your search based on the name of a spouse or parents. This is my favorite search. I recommend that for any family that is important in your tree, do a search of JUST the parents. You can search for ONLY a first name of one parent, or fill in all four names. “Other person” can be used with census records.
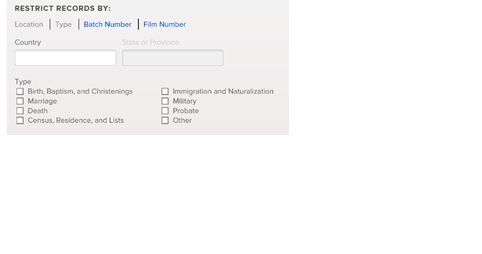
Finally “Restrict Records” – click “Type” and check box all the record types you want to find. You should be focused on looking for a specific record rather than just “find everything all at once”. So click the box next to “Death certificate”.
“Death” will include burial records at findagrave and billiongraves web sites. Batch Number and Film Number will limit your search to a particular LDS number. Not sure why this would be useful.
Now click “Search”. There will be a lot of search results unless you limit your search with many fields listed above. All of the fields you limited will be on the left panel of the screen, and the results will be on the rest of the screen.
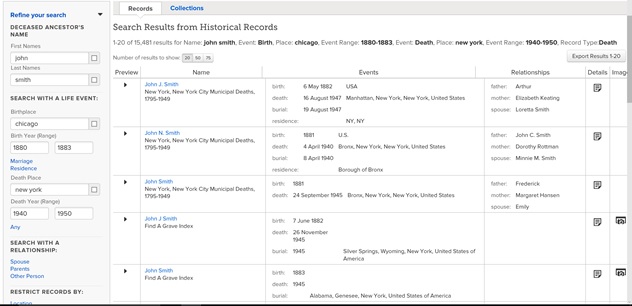
The left panel will let you adjust any of the fields you used in your search. Change a name, widen or narrow the year range, look for a birth instead of a death. Then click Update.
As you see above, the names are in blue, which always means “click here to see more”. If you click on a name, it will bring you to a detail screen of the information that has been indexed on that record. You may (or may not) be able to see the image of the original record. The far right column of this screen has a camera icon,

which means you can see the image of the original document (or no camera icon, which means you cannot). The details icon

can be clicked to see the same screen of details as you saw by clicking the name. The little arrow to the left of the name

will show the details as a preview, without leaving this screen. The arrow will now point down. Click that arrow again to roll those details back up and see only the search result.
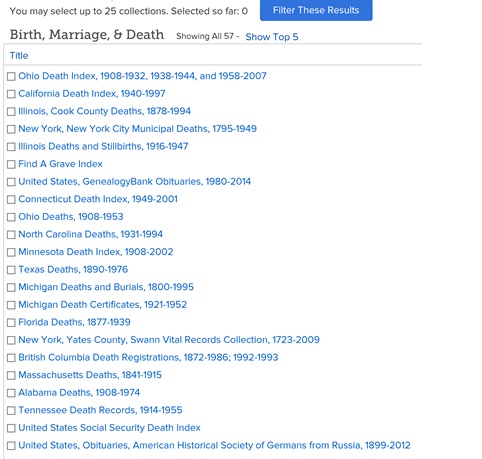
As you can see in this search result, there are no John Smiths born in Chicago 1880-1883 who died in New York 1940-1950. It did find a few New York deaths. It also found a couple of “findagrave” records. Let’s say I only want to see certain types of death records, to narrow the search still further. Click on the tab “Collections” above the search results. It will show you all the collections that contributed to the search results. You can check JUST the ones you want to see. It starts with the Top 5 collections. You have to click Show all 57 (or however many there are) to start clicking the ones you want. You are limited to 25 collections if you choose to limit them. You may notice that many of these have nothing to do with New York, and we specifically limited the death location to New York. Why am I seeing Ohio and California ahead of New York? Since you did not check “New York” as an exact result, the bottom of the many thousands of results includes other states. So just check “New York New York City Municipal Deaths” and click “Filter These Results”.
Now your search contains only the one collection. If you decide you want to see everything, you need to click “Search all collections” near the title at the top of the search results. Otherwise you will continue to search ONLY the NYC Deaths even if you change your record type to “Birth”.
SEARCH: BY LOCATION
If you cannot find what you are looking for, it is a distinct possibility that your films have not been indexed. You may need to browse the films that are available. You can do this one of two ways. You can search the Family History Library catalog by clicking “Search” from the home page and then clicking “Catalog”.
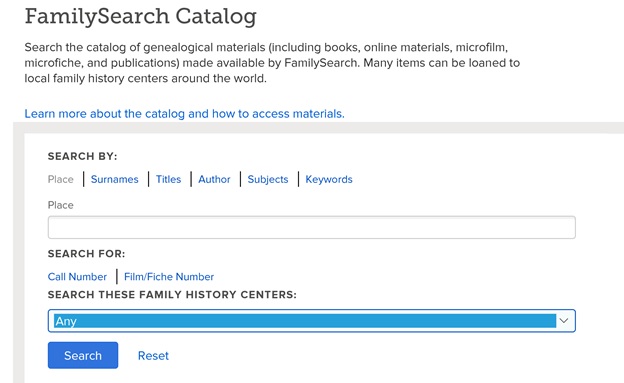
You can click the blue items next to “Search by” to limit how you search the catalog. I usually use Keywords to find a specific Chicago Catholic parish name. You can use Surnames to find a book about a specific Revolutionary War ancestor. I would recommend searching “Any” family history centers, because very few of them have their film list online.
When you find the locality, and the collection name, you may see a note that looks like this:

Once you click “here” you can try to search that collection by name, which works exactly like Search Historical Records but is only for this collection. However, maybe only part of the collection has been indexed. However, below the search screen is a little note hiding from you. Click on “Browse through” however many images are available.
You may first see a large geographic area covered by this collection, in this case, Province “Bari”. Click on the area you want.

This it lists all the localities in that region that are included in this collection. Click on the one you want to browse. Then you get a list of record types within that city/county/hamlet. Each one might have a single year or a range of years. Click on the one you want to try first.
SEARCH: BY COLLECTIONS
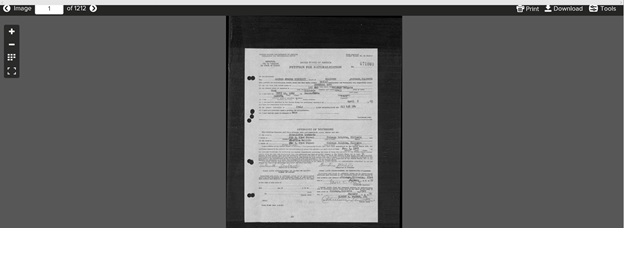
You will see a screen with the first record. (Or you will see a screen that says that you cannot view these records. Some records can only be viewed at a Family History Center, or not at all.) Obviously you cannot see this text so you need to zoom in. Click the big plus or minus on the left to zoom in or out.

It’s up to you if you want to just start with record number 1 and browse through them all. Use the left and right arrows to scroll from one image to another sequentially.
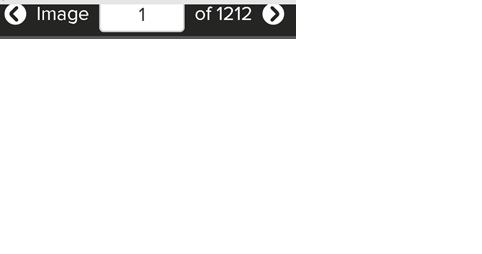
If you look at this record and you clearly need to jump to the middle, or closer to the end, you can change the image number. Type “600” and press the Enter key and it will jump to the 600th image.
There are two other small icons on the left.

shows thumbnails of a bunch of pages. You can use this to see the yearly header page in a film and jump to the next year. Very handy.

expands the image to full page. The Escape key exits this full screen mode.
There are some tools on the right side of the screen.
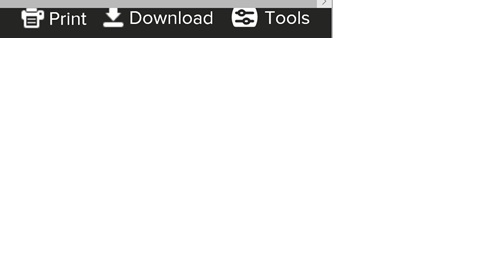
Obviously, “Print” will print a copy of the record. “Download” will save a copy of the record to your download folder in Windows. Tools will allow you to rotate the image 90 degrees to the left (or 270 degrees to the left, which is the same as rotating it to the right!) Adjust image allows you to adjust the brightness and contrast but you probably won’t need to. Invert will change white to black and black to white, for those images that were filmed as a reverse negative.
Once you find a record you want, and you have printed or downloaded it for yourself, you can “Attach to Family Tree” by first creating a Source, and then linking this record to the person. Anyone who can access the person can also see your sources, which will help confirm the accuracy of the information.
You can also find your way into the catalog by clicking the map located under “Research by location”
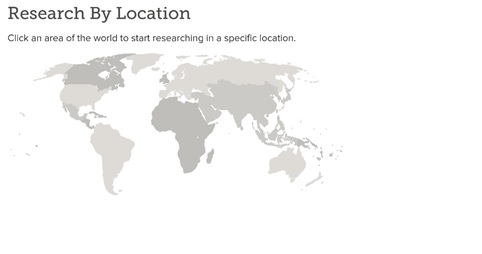
You can click on the USA, and then pick a state. You can also pick the entire nation if you want to use records, such as census, that apply to the entire country. The screen will show you all collections that belong to that area. You can select the collection you want. It will work just as described above.
SEARCH: GENEALOGIES
Basically this is the same search screen as when searching records, but it searches the family trees that have been uploaded and created in familysearch. All the same techniques work in this search screen as in the other one. This is also the place where you can upload your own tree to familysearch. At the bottom of this page, click “Submit tree”. You will see this screen.
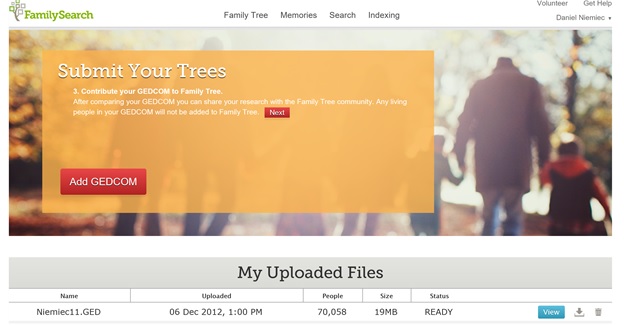
You click “Add GEDCOM” and then find the gedcom file you exported from your family tree software. After the gedcom uploads and does some routine processing, you can see that it wants you to Compare, which will run your tree through the other trees looking for possible matches.

Click “View” to work with your tree. Click the down arrow to download your own tree into a new gedcom file, let’s say after you’ve made changes within familysearch. Click the “trash can” to delete your entire tree from familysearch. The first time you view your tree, you will have to resolve the potential matches. Click “Review results”. Each potential match shows your record and some other record submitted by another user. You look at the data and either click “Yes” or “Not a Match”. Do not match people up because they have the same name and the dates are all wrong. Look at the data carefully.
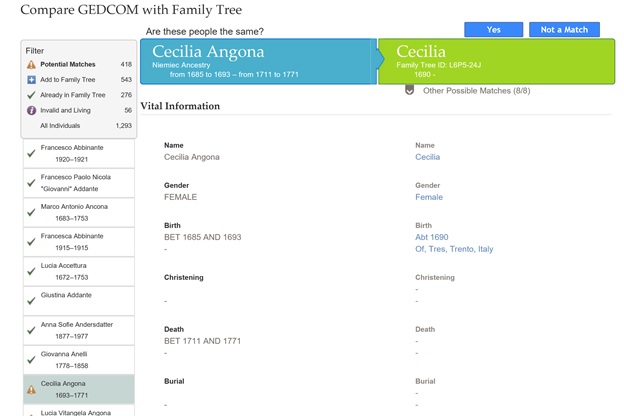
Go all the way to the bottom to compare parents and spouses, which is a better way to be sure it is a match.
You need to plow through everybody in your file – it will take some time. Perhaps only upload ancestors on the first go around. If you have thousands of people in your file, you’ll never get done with the compare!
INDEXING
Familysearch is developing a browser based indexing program, so if I teach you how to use the downloadable software, it will probably be obsolete in a short time.
There are hundreds of indexing projects active at any one time. Your best bet is to select a project from the geographical areas you have already researched, since you may be more familiar with the handwriting and the names. You should start at the Getting Started page for Indexing, and download the software. The software will retrieve active indexing projects and you can select from your preferred projects, based on your language settings, or from a list of all projects.
Once you select your project, you can download a batch of records. If you decide that you do not want to work on this batch, you need to “return” it. Do not just ignore the batch. Give it back so someone else can take a stab at it.
Basic indexing guidelines: always type what you see, even if you know it is incorrect. If a piece of information is abbreviated, such as a first name, index it abbreviated. Do not presume G.W. Johnson is George Washington Johnson. Watch for ditto marks (“) or the abbreviation “Do”. Don’t type that in the index. Repeat the info that is being dittoed. If you cannot read one character in a field, type “?” for only that character, such as John?on. If you cannot read multiple characters, type an asterisk, such as Jo*son. If an entire record is utterly unreadable, hold CTRL-SHIFT and press U to mark the entire record as “unreadable”. For more info, read the general guidelines at https://familysearch.org/ask/salesforce/viewArticle?urlname=Basic-Indexing-Guidelines-1381813432182&lang=en
If you go forward with indexing, you should click on the project instructions first and learn what to do with this project. For example, Cook County death certificates have several identifying numbers in various locations on the document. You need to know which one of those numbers is the sequential certificate number. As you start, click on “field help” and read that, so you know what to do specifically with each field.
The screen will highlight the area that contains the field you should be indexing. Type it in. Use type-ahead to save time, because some items repeat themselves within a set of images.
I recommend you set aside the same time every day to work on indexing, even if it’s only 30 minutes. It is easy to let this go due to the demands of life. Hence, I don’t index very much! I have been told by practically everyone that the way for people like me to do indexing is to set aside the same time every day.
For more details on any of these areas, see the “Help” screens on the web site. Sometimes they even have short movies that explain the screens, plus help for people who have used more areas of the web site than I could cover here.
If you have any questions, send me an e-mail at italianroots@comcast.net and please put “Fra Noi” in the subject line. Have fun!